

Published 6th Jul 2021
The Signmaker’s Guide to Applying Floor Graphics
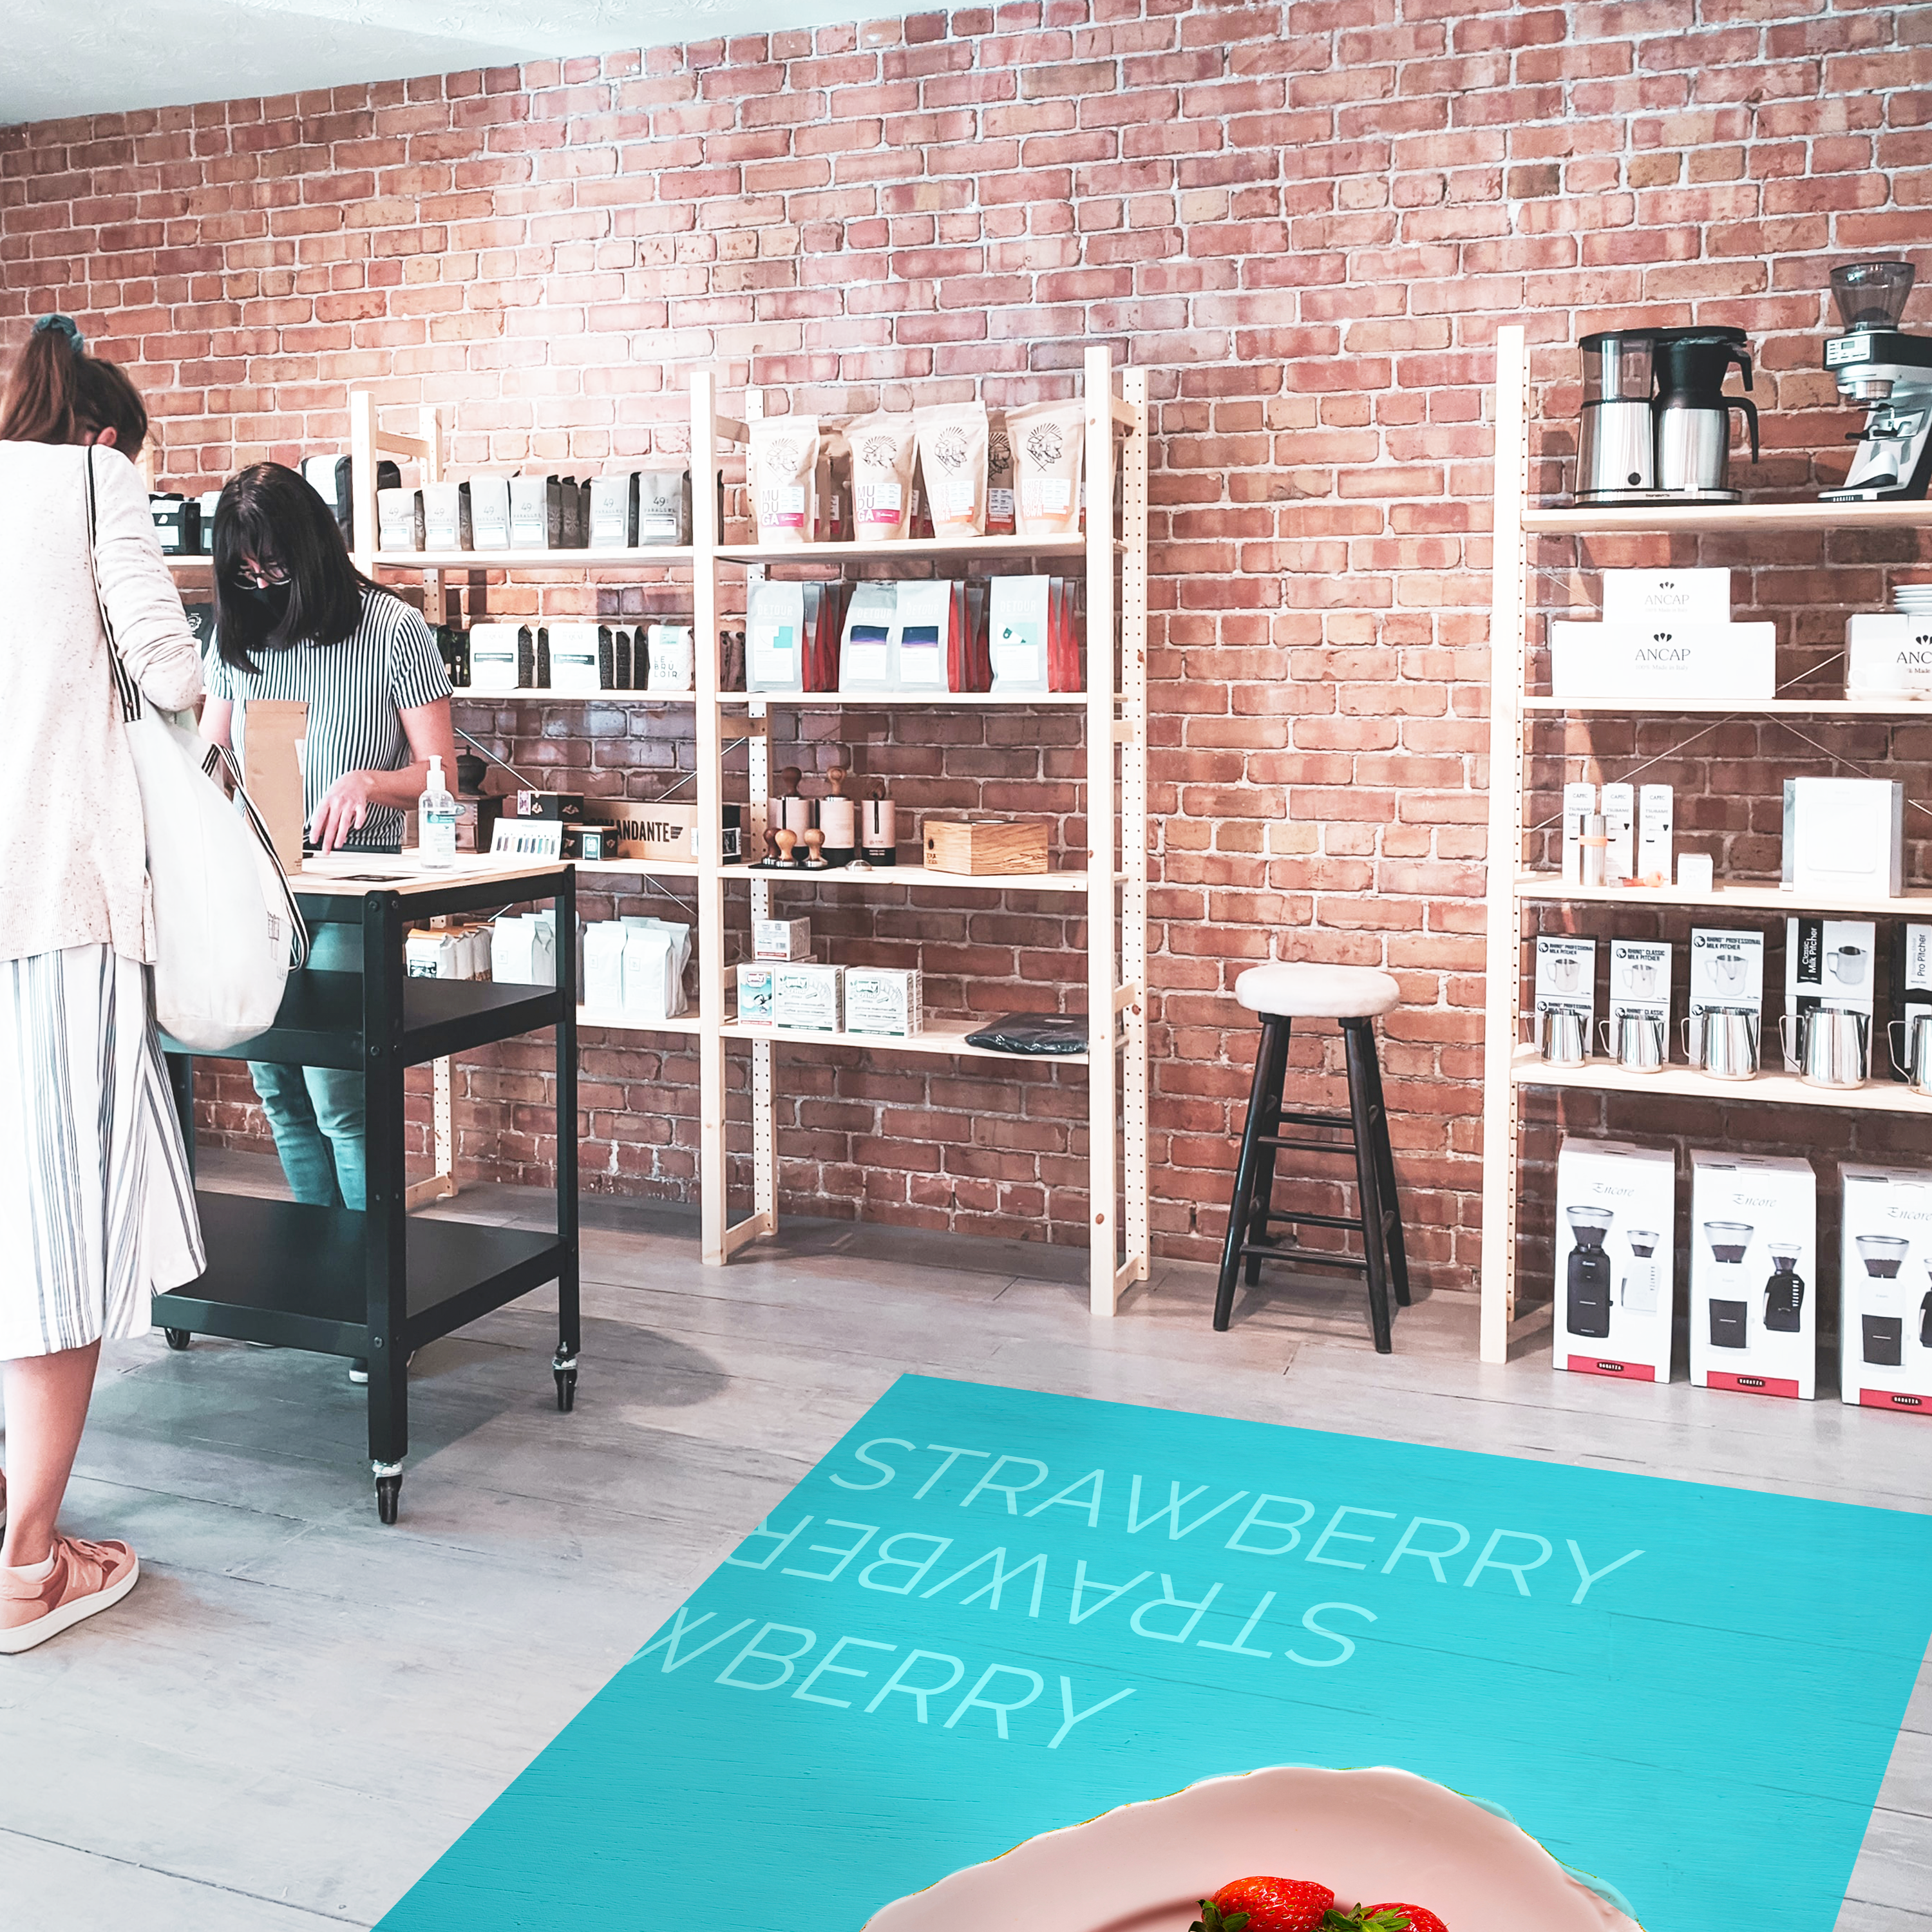


Applying floor graphics can be a challenge for even the most experienced signmaker, unless they follow a few basic rules. We run through each stage of the process in this complete guide to applying floor graphics.
Floor Assessment
Floor stickers must be applied to clean floors in good condition. Floors should be clean from dirt and dust that would contaminate the adhesive, and reduce the overall bond. Unless otherwise stated, our floor graphic systems have been developed for commercial tile floors, sealed concrete, sealed wood and ceramic tile.
The floor finish (concrete sealer, wood sealer, coating, paint, tile, etc.) must be firmly attached to subfloor. Floor finishes that do not adhere well to subfloor may separate/release resulting in premature lifting of the graphic and/or cause damage to the floor during removal. Do not apply to uneven tile as this will result in accelerated wear of the graphic.
If application is required to carpet, this should be done using our GF 212 ‘Carpet Advertising’ vinyl. This specially formulated flexible vinyl with high performance acrylic pressure sensitive adhesive, has been designed for temporary floor signs, stickers, and point of purchase advertising on commercial carpets. The combination of vinyl and adhesive allows removability of the film from most common commercial carpets for up to 6 months under normal exposure conditions. These are carpets with a short nap and a tight weave containing minimal texture. Carpets should be clean from dirt and dust that would contaminate the adhesive, and reduce the overall bond.
The suitable floor temperature range is between 4°C – 30°C. We would always recommend applying a test print first.
Preparing the Floors
(not applicable to carpet applications)
Floor must be cleaned with commercial cleaning products. Rinse application area with clean water and allow to dry as a final cleaning step prior to application. System will work with most waxed surfaces as long as they do not contain silicones.
Floor Graphic Printing & Artwork Considerations
Heavy deposits of under cured or uncured solvent or UV curable inks can affect the dimensional stability of the self-adhesive film in use. Retained solvents can reduce abrasion resistance of the ink and weaken adhesive strength. Care should be taken to fully cure, dry and outgas all prints prior to packaging and/or application. Allow 24 hours as a guide, though ink rich images may take longer to outgas.
Using a take up roller immediately after printing, can result in the retention of solvents.
How to apply the floor graphic
If the sticker is small, remove the liner from the back and position the graphic on the cleaned floor. Using a squeegee, start at the middle of the sticker and work to the edges with firm pressure to avoid trapping air. Overlap all strokes keeping the edges from contact until firmly pressed with the squeegee. Make sure all edges and corners are firmly attached.
If the decal is large, the wet method of application may be used. Remove liner from backside of decal. Spray clean water on the adhesive. Position the sticker on the clean floor and squeegee the water from the centre to the edges to avoid trapping air. Make sure all edges and corners are firmly attached.
If multiple panels are used, butt all edges. Do not overlap seams.
The installed graphic should be left for 24 hours before being exposed to moisture., allowing the adhesive to fully cure. Cleaning and polishing must be avoided during this period also.
How to maintain the floor graphic
Our two part Traffic Graffic floor advertising, laminated using either the GF 109 or GF 211 overlamates may be cleaned and maintained using normal commercial procedures and equipment. In order to maintain the longevity of the decal the floor graphic must be waxed before buffing.
Our all-in-one GF 229 ‘WallMark’ floor vinyl may be gently wiped over using a cloth, sponge, or paper towel with water. Do not use abrasives.
Minor edge chipping can be expected. However, if any edge of the decal lifts from the floor, the entire decal must be immediately removed and replaced to prevent a tripping hazard. Avoid the use of heavy equipment or dragging heavy items across floor graphic.
How to remove the floor graphic
To remove the Traffic Graffic decals start at one edge of the decal. If wax is accumulated around the edge a putty knife may be required to lift the decal’s edge. Once an edge is loose from the floor, pull back on the decal using a smooth consistent force. Large decals may have to be removed in pieces. When pulling back the decal, use a knife to slit an edge. When pulling, the slit will continue to tear allowing removal in smaller pieces. When one piece is removed, start the second section of the decal as done before with the first piece.
The decal removal may remove some of the wax on tile floors. Clean and re-wax that area.
No liability can be given for damage to flooring even with removable adhesives, as often this can be down to the bond between the sealant and the subfloor, which is outside of our control.
It is highly recommended your specific application be tested before production.
If you have any questions about applying your floor vinyl – get in touch and our team will be happy to answer your questions!
Latest blog posts
View all posts14th July 2026
Summer Signage Ideas for Print Businesses
Summer is one of the busiest, brightest seasons in any sign maker’s calendar. From pub gardens and food festivals to [...]
13th July 2026
FASTSIGNS Leicester North joins The Big Print Network
Newly launched Leicester franchise joins Innotech’s ambassador programme after an introduction at the FASTSIGNS [...]
6th July 2026
Imagink joins The Big Print Network
Print business joins Innotech’s ambassador programme after ten years as a customer Imagink has become the latest [...]